Return To Middle School Lesson Plans
Click here for a printable version
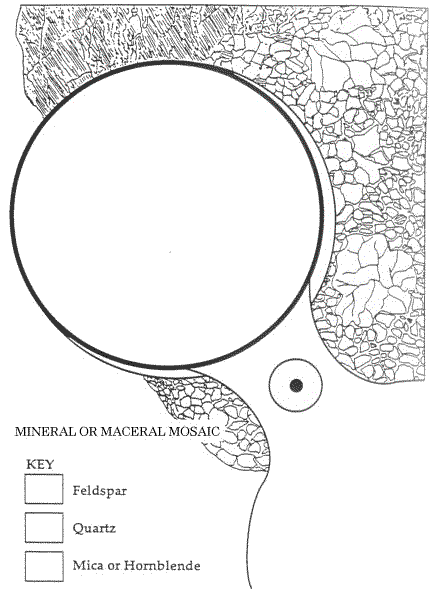
Title: Mineral or Maceral Mosaic
Level: Middle School
Time: 30 minutes
KERA Goals: 2.5
Objective:
Students will understand that rocks are made up of minerals or organic material; and that scientists who study rocks (geologists) can identify and classify a rock by identifying its components.
Materials:
Activity:
Pass out samples of coal and granite. While the students are looking at them, explain that feldspar, quartz, and mica or hornblende make up the minerals in granite. Most of what they see in the granite is probably feldspar which looks gray, white, or pink. The clear, glassy mineral is quartz. The dark speckles are mica or hornblende. (Mica is very shiny; hornblende appears dull). Coal has four main constituents: vitrain, fusain, clarain, and durain. Vitrain and clarain occur as bright glossy bands in coal. Fusain is dull and charcoal like and durain has a dull lustes.
Explain that coal is made up of organic components called macerals. If possible examine thin sections of coal under a microscope.
Tell the students that they will make their own "granite" or "coal" using pieces of construction paper. Even though each piece of granite will have the same minerals in it, each student's rock will look different. Explain that this is what happens in nature; granite is ways made up of the same materials, but the proportions vary from rock to rock. Coal is formed from decayed plants. Different types of coal form according to the amount of heat and pressure the plant material has undergone. The bright and dull bands form from different parts of the plants.
Give each student one copy of the handout and one strip of pink, yellow, and black construction paper. Have them cut small pieces of each color as follows:
- pink rectangles for feldspar
- yellow triangles for quartz
- black squares for mica or hornblende
Have each student glue their pieces of paper in a random pattern in the area of the magnifying glass. Also have them glue one piece of each shape in the KEY.
Display the results and compare the different patterns. See if the students can find any two patterns that are the same.
Teacher Hint:
Use a hand lens or magnifying glass for a better look at the samples. Activity can also be used to explain how a key works on a map.
Adapted from materials provided by The Society for Mining, Metallurgy, and Exploration, Inc.